


OUTDOOR CANNABIS BREEDING REPORT - PART 3

Welcome to my third grow report, for those who missed out on part-2 clcik here: Breeding report - part 2. In my previous report you have read that I have germinated an extra Hollands Hoop seed, the Hollands Hoop # 2. This 'seed' is already a large plant and even longer than some other cannabis plants of mine that had germinated before.
Leaf problem (Yellowing) with my Cannabis plants
Despite the fact that all my cannabis plants are doing well, I do have a small leaf problem. It is true that the leaves remain slightly yellowish. I think it is malnutrition, so I started feeding a little more. I give organic fertilizer, so the result is not always immediately visible. This has not bothered me before, because the soil I used so far was pre-fertilized. That is why I "guess" that the cause of the yellow cannabis leaves has to do with malnutrition. If this turns out not to be the cause, then I will see it automatically and the cause could therefore be the opposite, namely overfeeding. However, I think malnutrition is the cause of this problem. That is why I also applied a small extra layer of new (pre-fertilized) soil as a top layer, on top of the soil that was already in the pots. I also sprayed CannaCure again. Moreover, the reason of the yellowing of the cannabis leaves could also be due to an incorrect pH value of the nutrient water, as a result of which not all nutrients are effectively absorbed by the cannabis plants.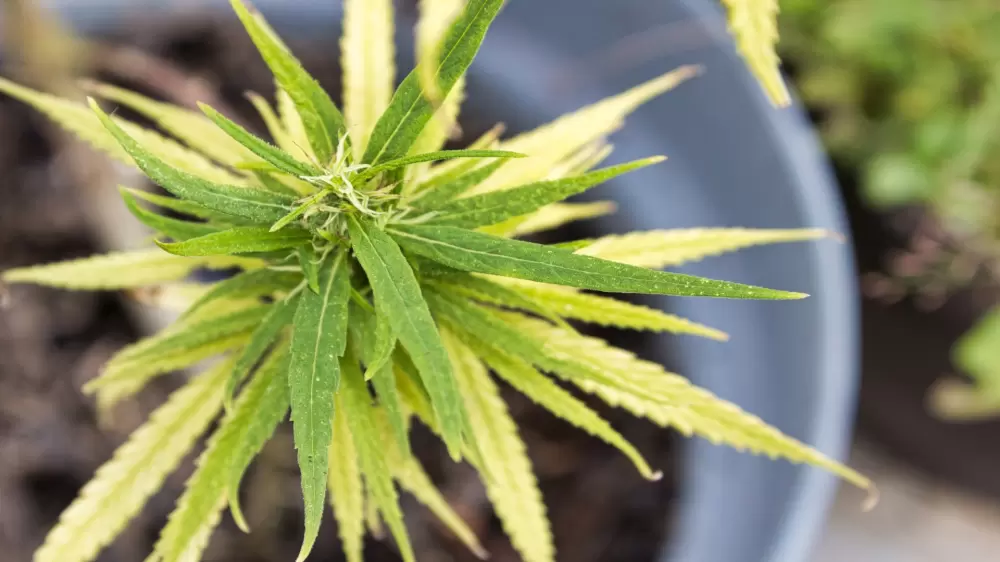
Bluelab pH Meter
As I explained above, the yellowing of the weed leaves can be related to the pH value of the nutrient water. You can only find this out in one very precise way, and that is measuring! Unfortunately, a good pH meter costs a lot of money, but it's a must have! After a bit of searching, I found out that most (professional) growers use pH meters from the Bluelab brand. So I ordered this immediately and after receiving the pH meter, it had to be calibrated or "calibrated" with calibration fluid. PH4 (.01) and pH 7 (.01) are often used as the calibration substance. There is enough explanation about this on the internet and there are also many (YouTube) videos about pH meters and their calibration. So I managed to calibrate my new pH meter from Bluelab within the foreseeable future. Then I prepared the feed water with tap water and BioCanna food and measured it. The pH value of the feed water came to a value of 6.3, which is a very good value for growing cannabis plants in soil. Since then I measure all the feed water and make sure that the pH value is between 6 and 7. If necessary, adjust the pH value downwards, I do with Plagron Lemon Kick. This is a natural product. You could adjust the pH value upwards with pH +, but I don't need that in my case. The pH meter from Bluelab works well, but it is good to handle it carefully, because the glass measuring point / sphere is very sensitive and the pH meter itself, as I said before, is quite pricey. You must also store it correctly, with the measuring point in storage liquid.
Result of FIlMMING my Cannabis plants for the second time
In my previous report you can read exactly what Fimming or Topping for pruning techniques are. Briefly very briefly: "cutting" or shortening the (main) top with the aim that it will create more branches and therefore more tops(Buds). When you start topping you cut off the whole top and with the Fimming you remove a small piece of the top, as if you missed the top. Fimmen comes from FIM and that stands for Fuck I Missed. Now you immediately know where the name for this pruning technique comes from. I have now "Fimmed" my plants for a second time. As a result, the plants become "bushier", produce more (deren) buds and eventually this could increase the harvest. The recovery time after Topping or Fimming cannabis plants is about a week or two. So never do this too quickly and / or too often in a row. Give the "ladies" some recovery time and rest in between. Do this Budding or Fimming ONLY ONLY during the growth period of the cannabis plants. These two pruning techniques are namely High Stress Training (HRT). Low Stress Training (LST) pruning techniques, for example, can be continued during the flowering period.
Weed Cage / Caging my Cannabis plants
Then we have now arrived at a new and special subject for me, which I can also write about with some "pride". A while ago I saw a few videos and photos of cannabis plants outside in "weed cages". I have done more research on this and came to the conclusion that this is a good technique to apply to your cannabis plants outside and a technique that you could perform instead of or even in combination with an SCROG (outdoors). The principle has also been partly copied from a SCROG. Place a cage around it from flexible garden fences or mesh to provide support against the wind, among other things, but especially for when the cannabis plants bloom and get or have buds and can often become 'top-heavy'. Such a weed cage is also good for creating multiple side branches / splits.
So far the theory, now practice. What do you need? And how do you do it? First, we are going to look at the material. It is best to use flexible garden fences / plant mesh or any other flexible mesh with the right size holes / mesh size. The length is also important since you want to place the weed cage all around the plant (enpot). For 6 Air pots with sizes 50, 38 and 20L I used a total of about 8 to 9 meters of flexible garden mesh. that comes down to about 1 and one and a half meters per pot, depending on the size of course. The (garden) mesh is one meter high. So I looked at how much I needed per jar, then cut the correct length and wrapped it around the jar. Then I confirmed it with tie wraps and, appropriately, some hemp rope.
Does it all sound simple right? Well no, it was quite a hassle because I did it alone, without help. My most important tip is that you do this job together with someone! One can wrap / stretch the mesh and the other can fasten it. So I had to do all this solo and also with quite large cannabis plants. My other tip would therefore be: start early (er), then it is much easier to get the mesh around it and you do not have to maneuver all the branches of the cannabis plants through it, which considerably increases the chance of breakage (s). . All in all, it took me about 2 to 3 hours, only so, but it was and is definitely worth it. It looks beautiful and a lot more professional and most importantly, it is very functional!
Flowering, Top(bud) Rot and Harvest Sensi Skunk Autoflowers
As you have read in my previous report, my two Sensi Skunk Autoflowers have both been blooming for a while now. By the week, the buds grew a bit thicker, until ... Yes, the weather of the past few weeks threw a spanner in the works. Much too cold, too humid and hardly any wind. Now you guessed it: this is indeed the ideal recipe for bud rot. One day, I don't remember exactly what day it was, I noticed a small brownish-gray top among my green cannabis buds on my cannabis plants. A clear case of bud rot. If the top feels light (er), soft and or (too) easy to loosen, then unfortunately you are dealing with top rot. If you do nothing about this, your cannabis plant and thus harvest can be completely destroyed in a few weeks. Completely eaten by the bud rot. So immediately cut out the brownish-gray top and disinfected the scissors immediately afterwards. However, due to the perfect weather conditions for top rot, this problem kept coming back and I kept cutting out small pieces. In the end I decided to put in the scissors and to rob the Autoflowers "of their lives" at an early stage. All this based on the motto: "something is better than nothing ".
Eventually they would be completely eaten by the bud rot. I have already harvested the Sensi Skunk cannabis plants and, I think, can still get reasonably good quality cannabis from them. Hopefully enough to smoke for a month or two. The buds are now hanging to dry. Another 10 to 14 days then I will weigh the buds and they will go into the cure / weck pots. By then they are ready to be smoked. I keep the trimmings in the freezer, so that I can make Hash or Edibles later.
Drying Tip: Hang your cannabis buds upside down, 10-14 days in the dark and provide adequate ventilation or extraction.
Storage tip: always store your dried cannabis buds in a glass (weck) jar, preferably in the (cock) dark, because light breaks down THC.
If necessary, use a Boveda Humidipak (58 to 62%) or Integra Boost (55 to 62%). These keep the humidity perfectly balanced, so that your weed never dries out or is too wet and can "cure" well in the glass jars.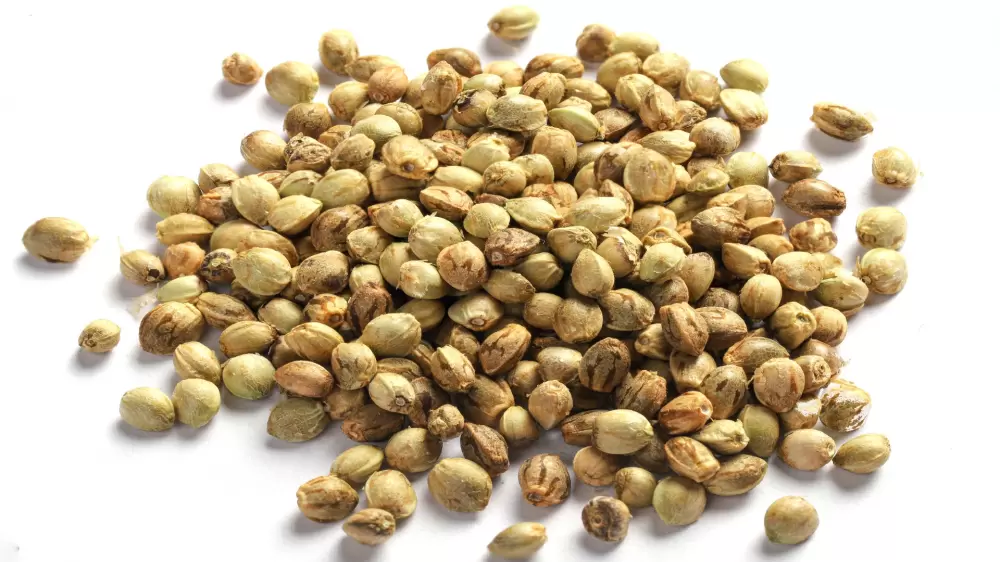
Germination Royal Queen Seeds Sweet Skunk 2x Cannabis Seeds
Of course it wouldn't be a complete report without me (already) germinating again. And would I keep my hit rate at 100% (ever)? The answer is YES! Again with the coffee filter method, which has never failed me, not once, at all. I swear by this method! But what did I germinate? These are the replacements for the Sensi Skunk Autoflowers, namely two new ones from Royal Queen Seeds with the Strain name Sweet Skunk (Auto). Within one week I was able to transfer them from the coffee filter to the 20L Air pots and they have already surfaced. Currently, +/- 3 cm have already grown above the ground (see photo) and both show two beautiful healthy young lobes. After the abrupt "death" of my two Sensi Skunks, there is still new life in the form of these two young Sweet Skunks (RQS). So you see, the eternal cycle of nature never stops!
Final Conclusion Outdoor Cannabis Grow Report - Part 3
Briefly in brief, generally all the cannabis plants are doing well. Except for a little bit of yellowing, which is in any case not due to the pH that I measured with my new Bluelab pH meter. They all have a self-made cage placed around them and are now "trimmed" twice. The Sensi Skunk Autoflowers have been harvested prematurely (due to bud rot) and are left to dry. The two RQS Sweet Skunks (Auto) have replaced this. One plant is already bigger than myself (1m85) and another follows her closely. All plants are now at least one and a half to even 2 meters high. All in all I can say that I am very satisfied and then we have really arrived at the end of this breeding report. Soon I can weigh and smoke my own grown Sensi Skunk weed, I'm curious! I continue to grow nicely and teach one or more (for you). Are you also interested in growing yourself? Then buy our cannabis seeds here: SeedShop
.